
Create your pilot eGCA ID, step by step.
Follow each stage in order. The screenshots and captions explain what to select, what to enter and what must be ready before you continue.
Skylink Aviation visual guide · Checked on the live eGCA portal 3 November 2026
Before opening eGCA, prepare your files.
Registration is easier when every document is scanned, named clearly and ready in the correct format.
The complete route at a glance
- 1New/Existing UserSelect Pilot and answer the PMR question.
- 2Personal DetailsMatch Class 10 records and complete both addresses.
- 3Email & Mobile ValidationUpload documents, receive OTPs and declare.
Keep these private: your password, captcha and OTPs. Skylink can guide you, but you should type these yourself and never send them to anyone.
Visual walkthrough
Open Sign Up and choose Pilot
Click: Sign Up → User Type → Pilot → Submit.The eGCA Login tab is only for people who already have an ID. A student applying for a normal pilot account should choose Pilot, not AELTO/TSP, Remote Pilot or an organisation category.
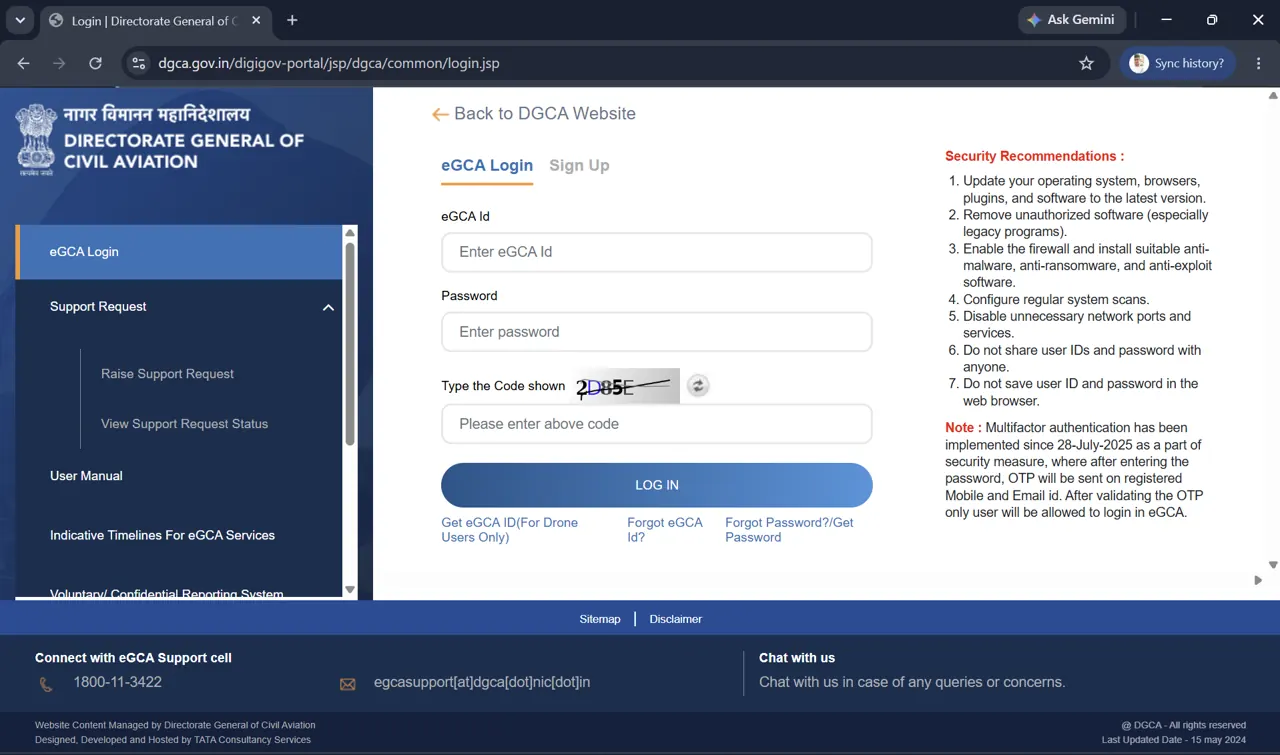
Begin from the Sign Up tab on the official DGCA page. Browser account photos have been cropped out. 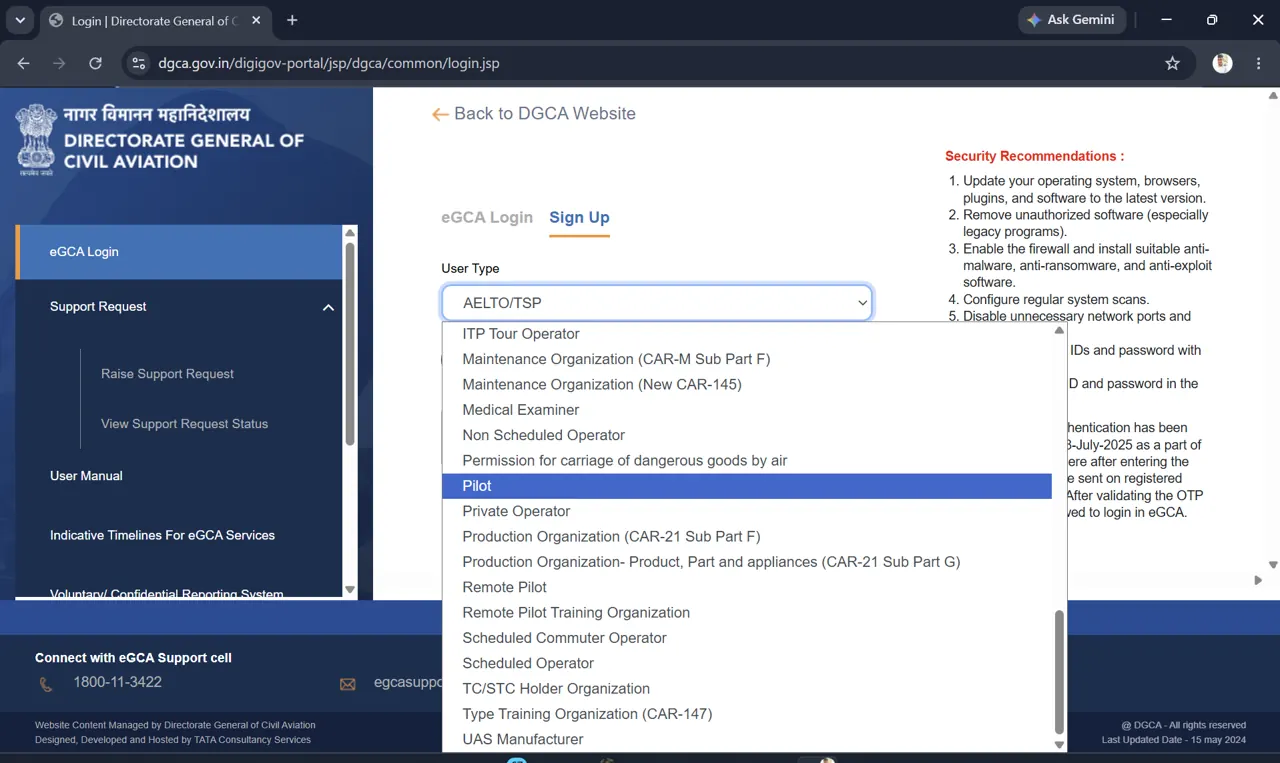
Choose Pilot and then Submit. Answer the PMR question
Choose NoYou are a new applicant and DGCA has not allotted a PMR/Medical File Number.Choose YesYou already have a valid PMR, or hold one of the licences named by the portal.The portal names SPL, FRTOL-R, FRTOL, PL, PPL, CPL and ATPL holders among those who should register with Yes. Do not create a duplicate record.
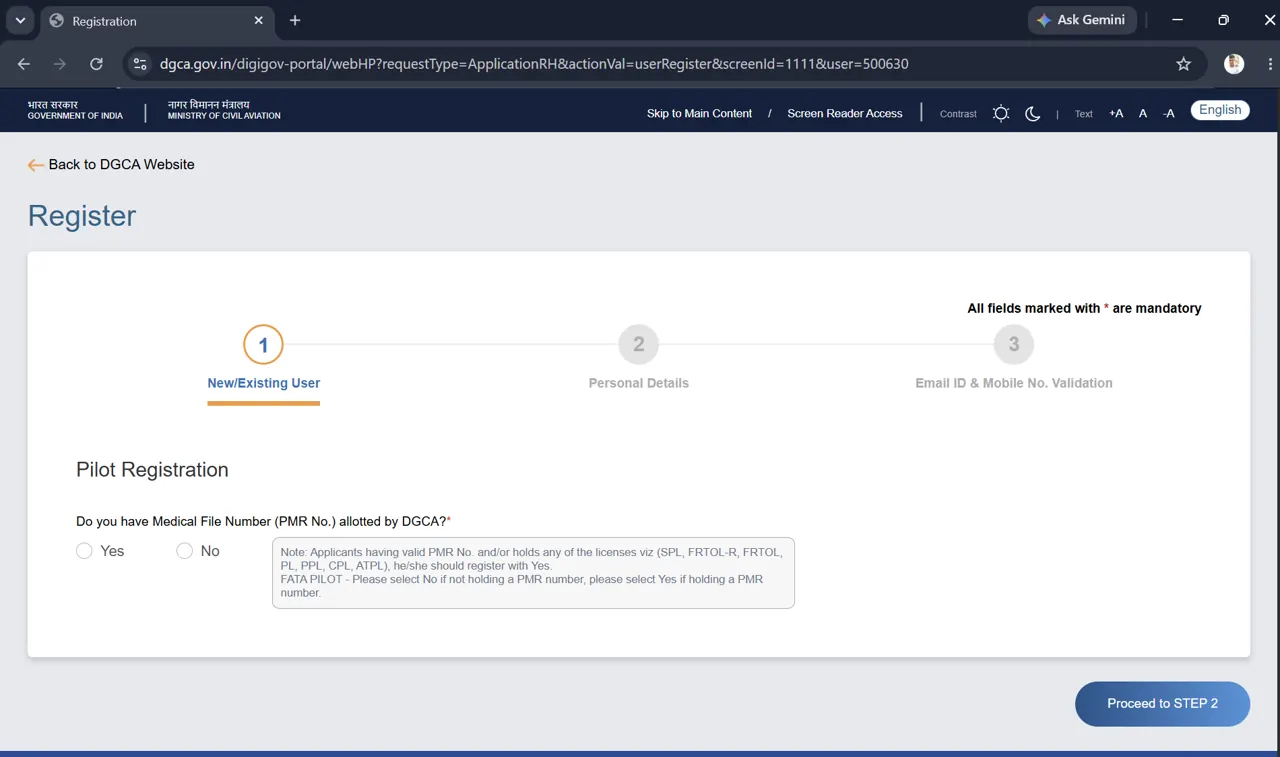
After choosing the correct answer, select Proceed to Step 2. Enter personal details exactly as recorded
Match: Class 10 marksheet spelling and date of birth.Complete first, middle and last name, gender, nationality, place of birth, parent or legal-guardian details, date of birth and blood group. Do not expand initials or change spelling unless the Class 10 record does so.
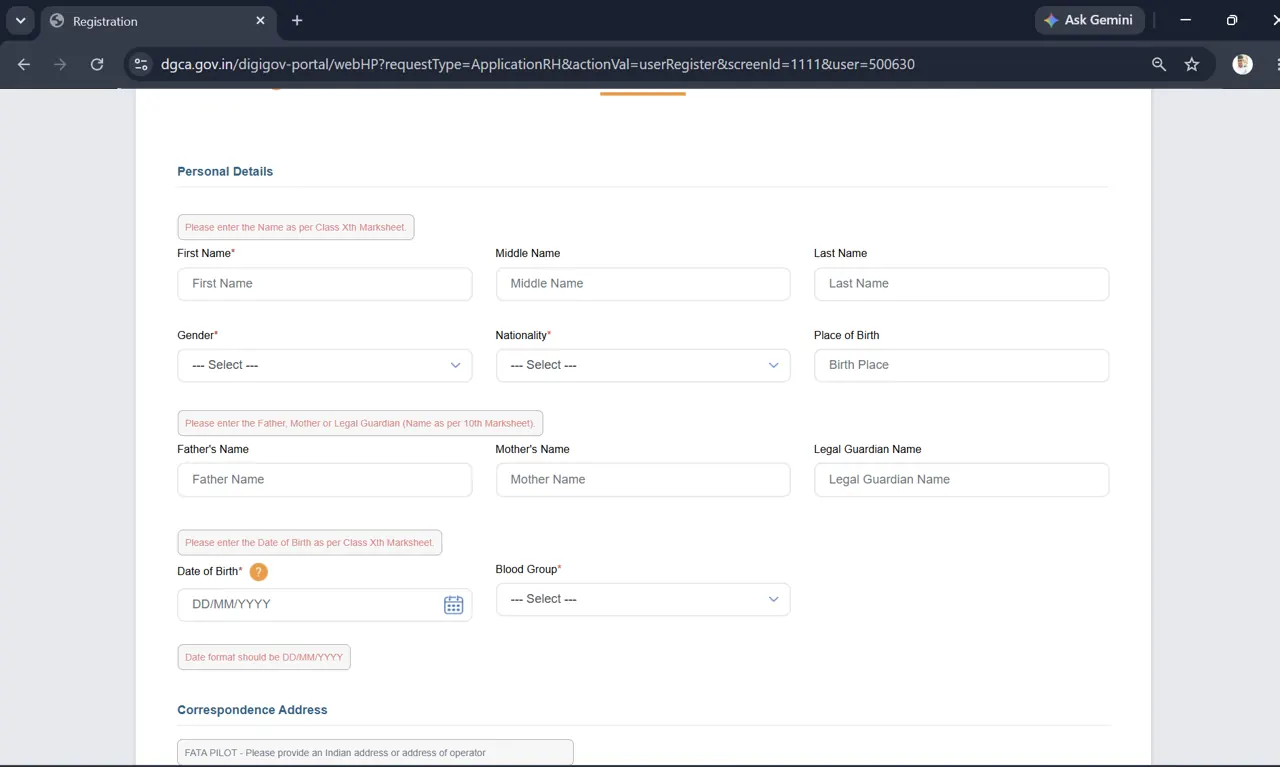
Names, parent details and DOB should follow the Class 10 marksheet. Complete correspondence and permanent addresses
Enter: Country, state, both address lines and PIN code.If the permanent address genuinely matches the correspondence address, use Same as Correspondence Address. Otherwise complete the permanent address separately. Address Line 2 is marked mandatory in the current portal.
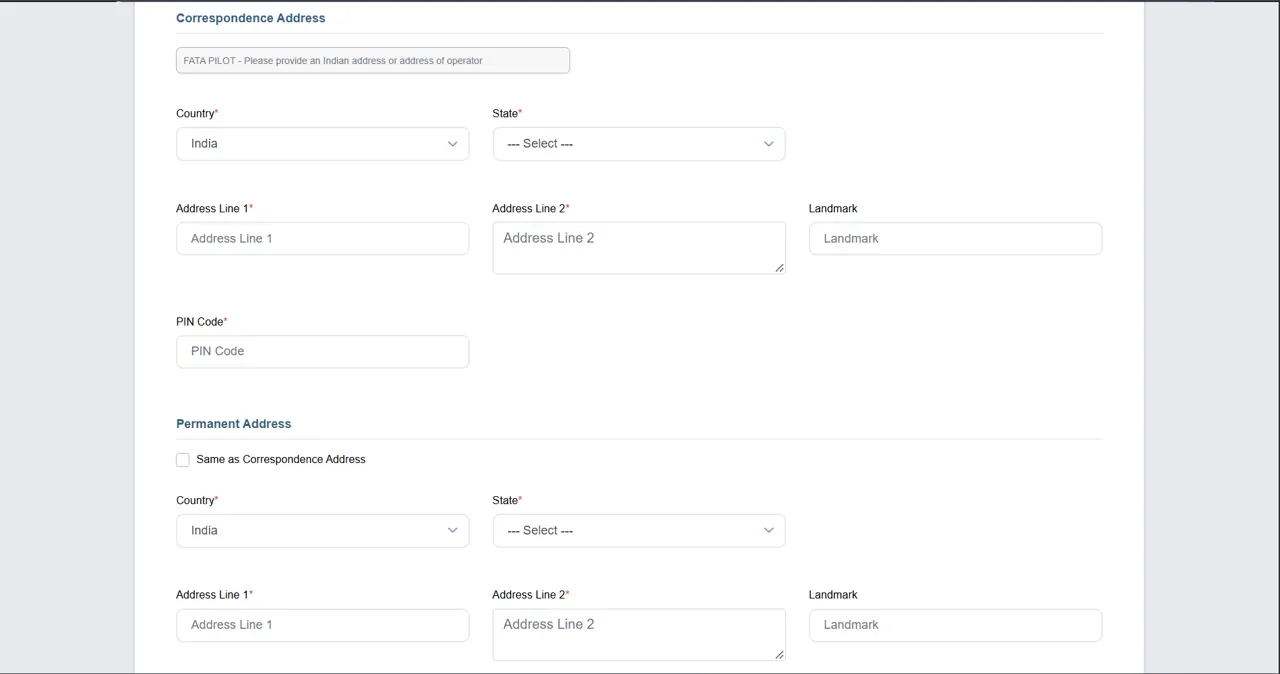
Use the checkbox only when both addresses are identical. Upload identity, photograph and signature
Double-check: the ID proof number must be entered twice and match the uploaded document.Choose an accepted identity type, enter the number, confirm it, then upload the ID proof. Upload the recent photograph and signature as separate files following the live portal’s size and dimension instructions.
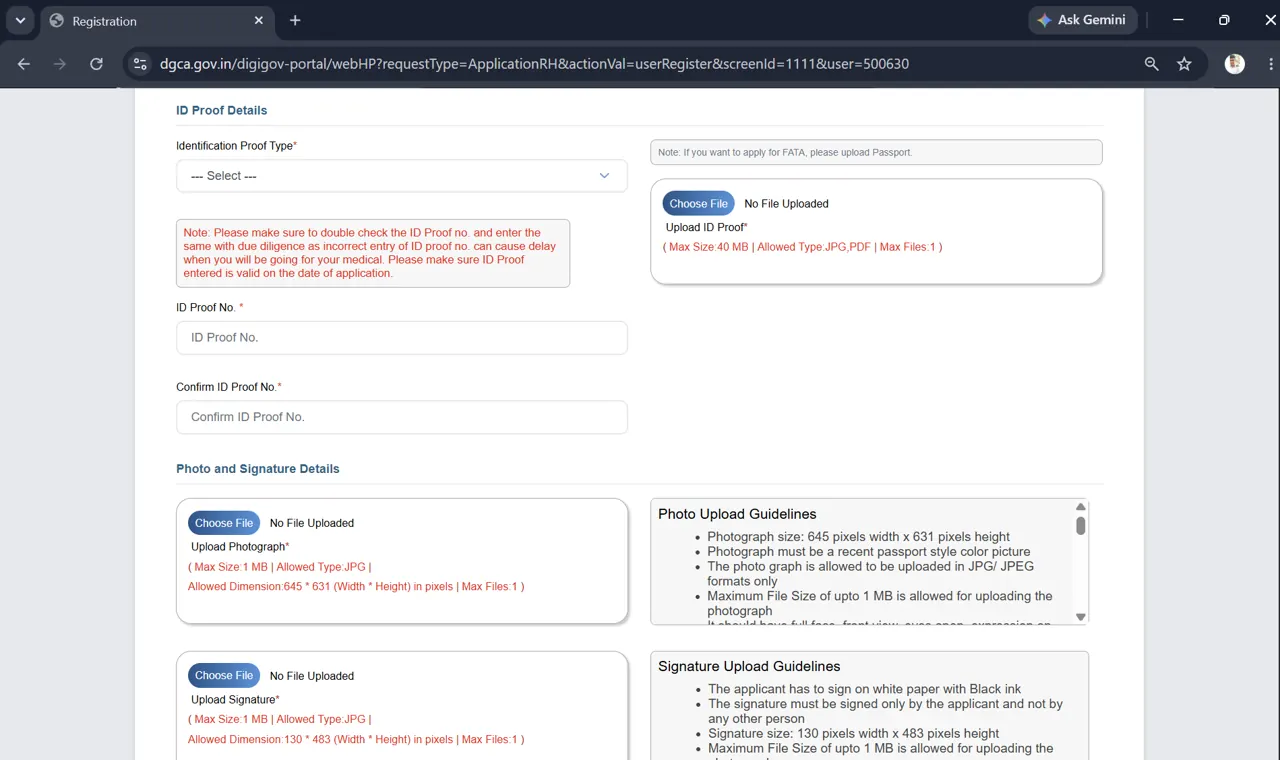
Read the live upload guidance before choosing each file. Upload education and address proofs, then create your password
Use: clear colour files—no black-and-white or grayscale Class 10 copy.Upload the Class 10 marksheet and permanent-address proof. Create a password of at least 10 characters with a capital letter, number and one permitted special character, with no spaces. Follow the live password hint because the allowed symbols can change.
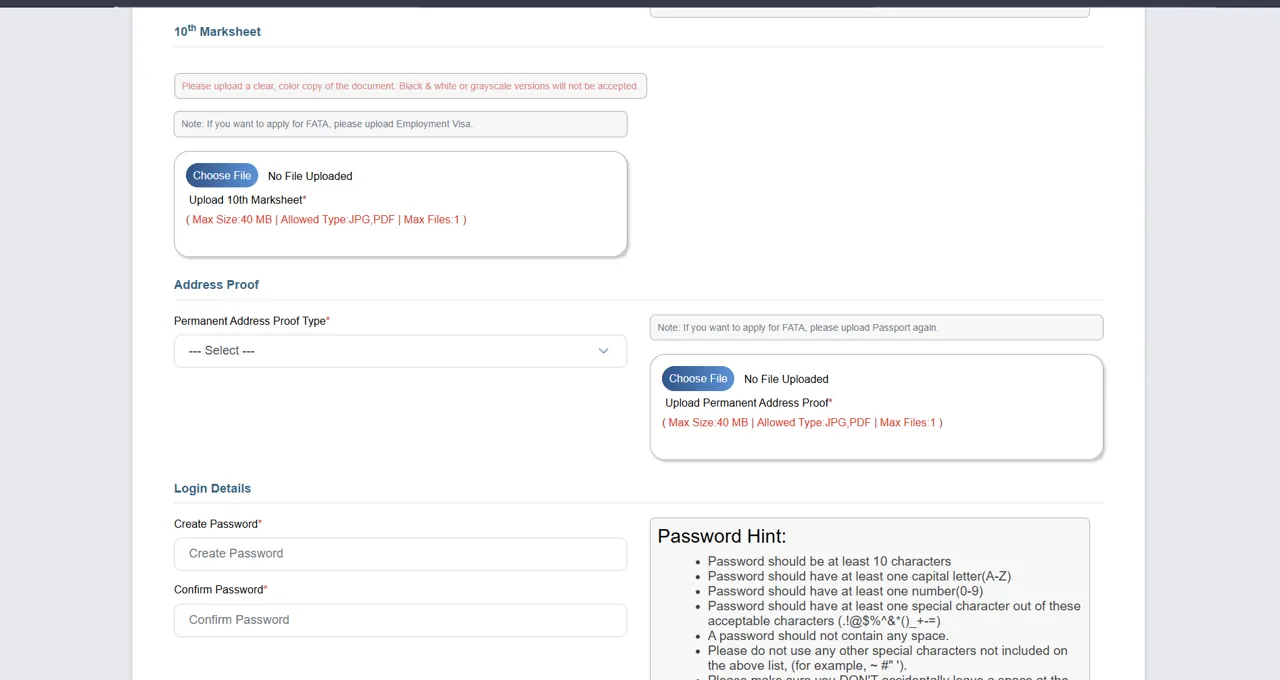
Prepare these files before starting so the form does not time out. Validate email and mobile, then review the declaration
Finish: Captcha → Receive OTP → mobile OTP → email OTP → declaration.Use an email and mobile number the applicant controls. Check the completed form before ticking the declaration. The declaration confirms that the information is true, complete and correct.
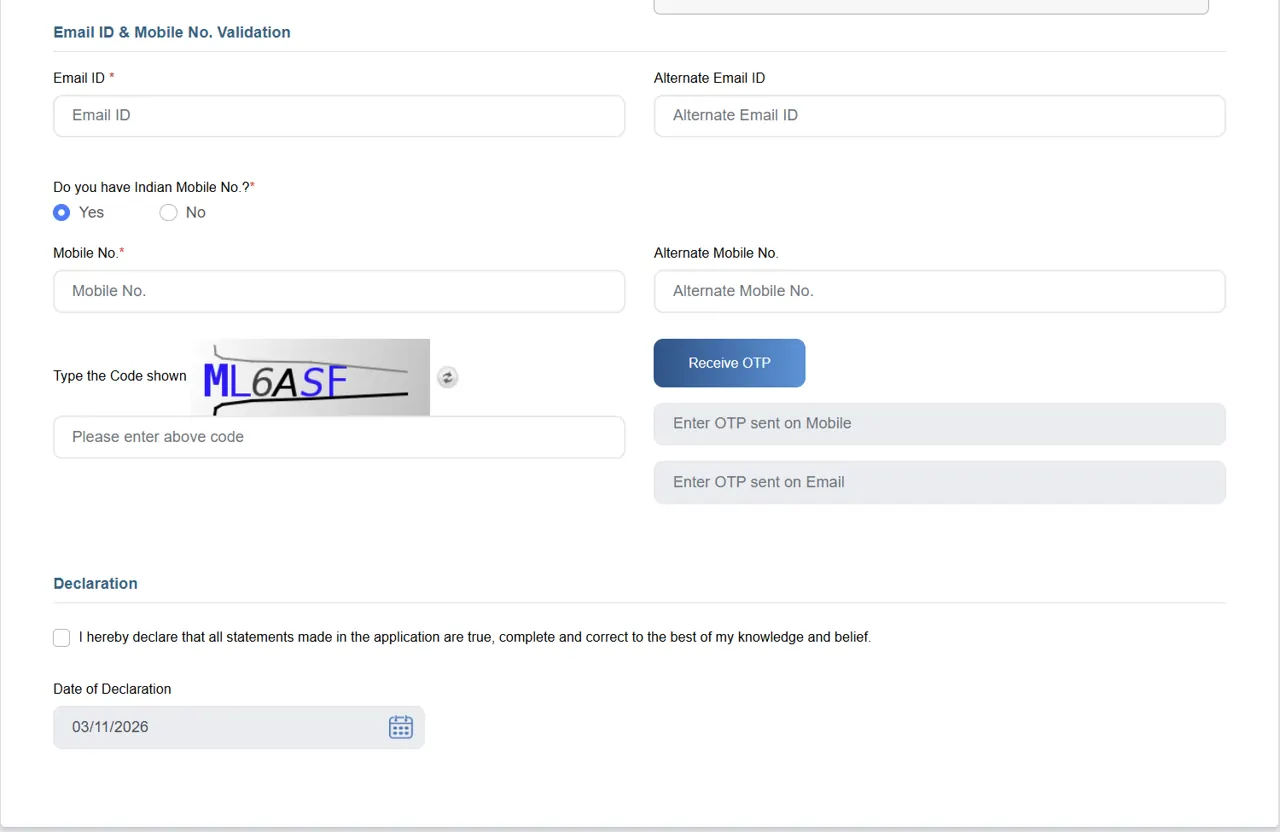
Only the applicant should enter the captcha, password and OTPs.
Prepare the documents exactly as requested
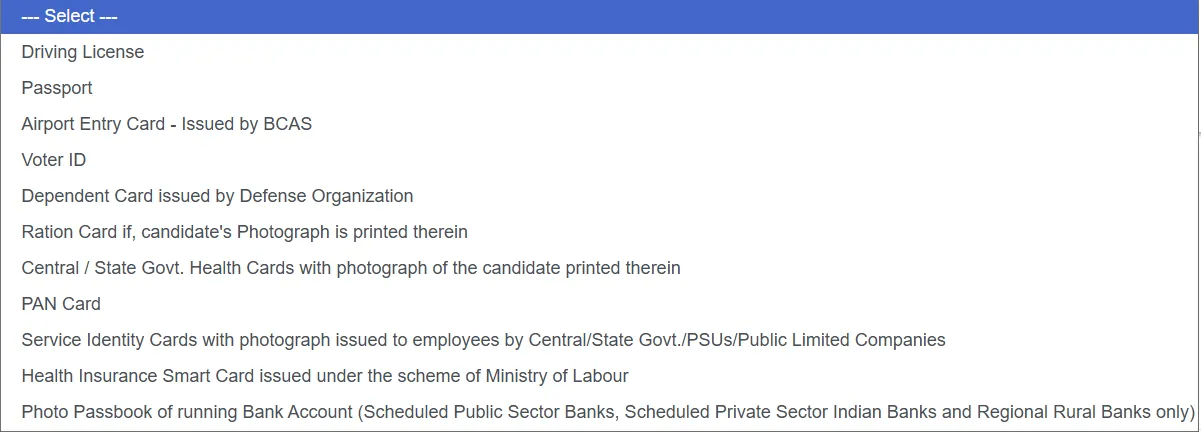
Accepted identity-proof options shown by eGCA
The supplied portal list includes driving licence, passport, BCAS airport-entry card, voter ID, eligible defence dependent card, ration card with photograph, Central/State Government health card with photograph, PAN card, eligible service identity card, Ministry of Labour health-insurance smart card and an eligible photo bank passbook. Use only a document currently offered in the live dropdown.
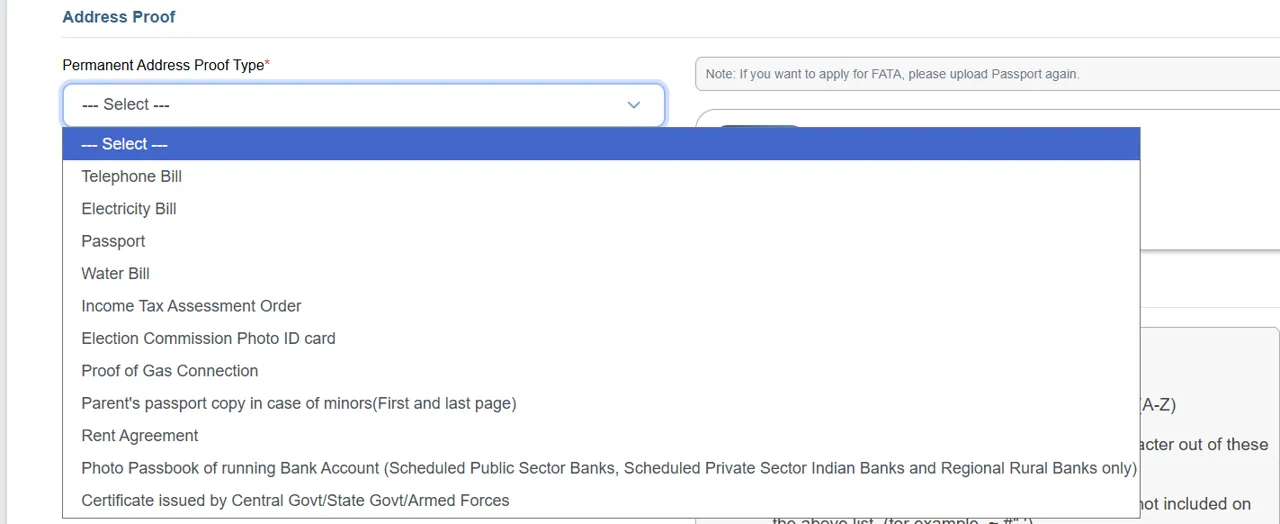
Accepted permanent-address proofs shown by eGCA
The supplied portal list includes telephone bill, electricity bill, passport, water bill, income-tax assessment order, Election Commission photo ID, gas-connection proof, parent’s passport for a minor, rent agreement, eligible photo bank passbook and a qualifying government or armed-forces certificate. Choose the current dropdown option that exactly matches the uploaded proof.
The live eGCA portal controls the final file types, dimensions, limits and accepted documents. If the live page differs from this guide, follow the portal.
After registration
Save your eGCA ID and sign in through the official portal. Multifactor authentication is active: after the password, OTPs are sent to the registered mobile number and email. For portal-specific errors, use the official support request or call 1800-11-3422.
Source and update note
This guide was checked directly against the official eGCA pilot-registration flow and the supplied screenshots on 3 November 2026. No dummy government account was submitted and no false identity data was entered.